Everyone in this world wants to be successful but are you willing to pay the price?Are you willing to make the sacrifices ? Are you willing to embrace your pain?
You don’t have to be perfect to be successful all you need is the will to be the best,
you should have a burning desire that lights a fire under your ass and pushes you to be great.No one ever told ALEXANDER the great to conquer the world but he did because he wanted to, he was willing to make the sacrifices, he was willing to accept failure, embrace defeat but people these days want to be successful but are not willing to make the sacrifices or suffer the pain , they give up easily, you cant be successful if you give up.
Thomas Edison failed 10000 times before he invented the light bulb, he could have given up many attempts before he succeeded but he didn’t.
Beethoven was told that he had no talent for music but he gave some of the best music.
Successful people don’t do great things, they do things in a great way, you have to make changes in your life, by that i don’t mean your lifestyle but i mean your habits.Folks, there are some common traits that if you absorb in your day to day life then you will definitely be successful then it would be just a matter of when rather than a matter of how
Qualities that make a person successful
DESIRE– A burning desire is starting point of all accomplishment.Just like a small fire cannot give much heat , a weak desire cannot produce great results.When you want to succeed as bad as you want to breathe you’ll be successful.
COMMITMENT– It’s the difference between wanting and succeeding.
PASSION-To keep going you need a fuel. You will not feel tired or bored rather you would enjoy working.
HARDWORK-Winners don’t need to appologise for winning because they work long and hard.If you want to get ahead in life then go the extra mile, there is no competition on the extra mile.
DISCIPLINE-Successful people don’t get sucked into social media,or dwell on past mistakes.They avoid negative people and negative thoughts.You got to stick with the rules that are meant for the betterment and fulfillment of yourself.
If you had, one shot, or one opportunity To seize everything you ever wanted. In one moment Would you capture it, or just let it slip?
Who You are? Well this is possibly one of the toughest questions to answer. Some of you may argue that is the simplest one, but do you really know who you are?
Introspection-the examination of your own conscious thoughts and feelings will help you to know yourself. This is the first step towards self improvement, as you will get to know yourself better so you can improve faster. Being introspective allows you to maintain close contact with your conscience. Your conscience is what helps you distinguish right from wrong, on looking inwards, you get the opportunity to weigh your options.
No one can judge you better than yourself. Your parents, friends, lovers will tell you their version of you, what they see, what they expect or sometimes what they want you to be but it depends on you to accept their version of definition or create your own, this can be done only if you know yourself. Introspection allows you to lock out the noise around you. It’s very easy to sway your thoughts based on what is presented to you on the outside. But listen to yourself first!
It’s easy to want to give in to a particular way of thinking based on influence. Your close friends and even family encourage you to see things their way. But what about your way? Remember that you alone are responsible for your life.
Looking inwards forces you to confront the person you are. What makes you tick? What do you believe in? Taking an honest look at your character brings you self-knowledge, can help build your self-esteem, and enables you to make changes if you want to.
Have you done or said things that offend others? Put yourself in their shoes and think about how you’d feel.
Look back at your experiences. Which outcome has left you feeling the most satisfied?
Being introspective will develop your decision making strength, You will feel the confidence in every single step you take because somewhere inside you know that this is something you actually want ,that something whatever it maybe will push you to go another mile that you might not do otherwise and that extra mile will make all the difference.
Avoid making “popular” decisions just because that is how others feel about a topic.
Before we do anything, we want to back up all files that are on your computer. This is a pretty easy step, just use whatever your storage device of choice is. We’re doing this because we will be messing around with the memory, so potentially something can get messed up.
CREATE PARTITION FOR UBUNTU
Make sure you have enough space for ubuntu installation.I prefer installing Ubuntu in a different drive than where windows is installed. To do so follow the steps
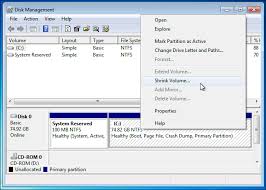
Open up the “Create and Format Hard Disk Partitions”, you can search “Disk Management” on the start bar to find this.
Unallocate the drive where you wish to install Ubuntu by right click on the volume and Select “shrink volume”.
This provides us with space to install ubuntu on the same drive.
CREATE LIVE USB
Next, we are going to create a Live USB stick, this will allow us to install boot up Ubuntu from the USB and download it to the computer. We need an 8 GB flash drive. If your flash drive is a little bit less, that will be fine (Mine said 7.4 GBs).Gohere and download the Ubuntu 14.04 system. Then follow this tutorial to create a Live USB.
CHANGE BOOTING OPTIONS FROM BIOS
Start the computer and press ESC, F1, F2, F8 or F12 during the initial startup screen. Depending on the BIOS manufacturer, a menu may appear.
Choose to enter BIOS setup. The BIOS setup utility page appears.
Use the arrow keys to select the BOOT tab. System devices appear in order of priority.
To give a USB device boot sequence priority over the hard drive, do the following:
Move the hard drive device to the top of the boot sequence list.
Expand the hard drive device to display all hard drives.
Move the USB device to the top of the list of hard drives.
Save and exit the BIOS setup utility.
The computer will restart with the changed settings.
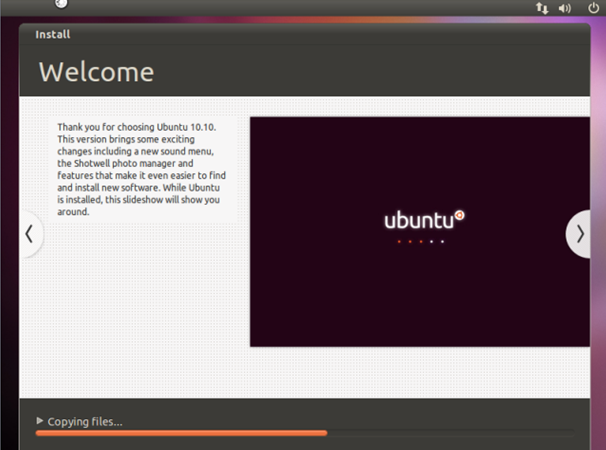
INSTALLATION
Boot from Ubuntu Installation media.
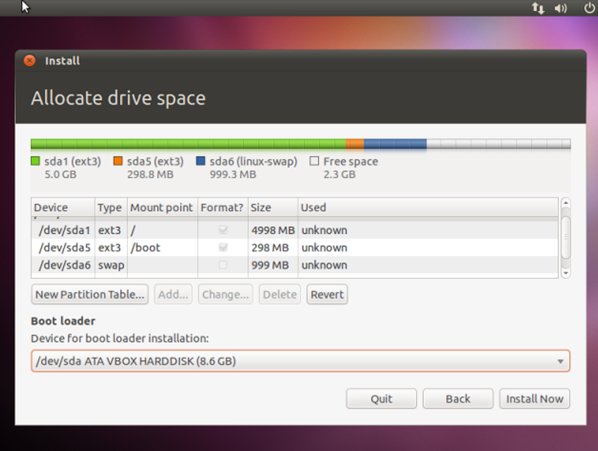
Start the installation. Choose “Something else”:
(Recommended) Create partition for swap. Swap is the partition for keeping unneeded memory pages, like Windows swap. Also it can be used for hibernation.
Select free space and click +
Set parameters like on the picture below:
Notice that you should set swap size more than you have physical memory in order to use hibernation. Also, you can place it in the end of disk, but thus it will be slow.
Create partition for / (root fs). This is the filesystem that contains your kernel, boot files, system files, command-line utilities, libraries, system-wide configuration files and logs.
Select free space and click +
Set parameters like on the picture below:
10 – 20 GiB should be enough
Create partition for /home. This is the filesystem for your user’s files: documents, images, music and videos. It’s much more like Users folder in Windows.
You can do this just like in step 5 and even choose other fs type (though I recommend use ext4 instead of reiserfs. Simply, the first is much more flexible and the second is quicker)
(Optional) Create separate partitions for /boot, /tmp and /var. Set their size according to your needs:
/boot should be 100 – 500 MiB
/var and /tmp should be > 5 GiB
If you doubt about which device for boot loader installation to choose, leave it default. It would be set by installer. But sometimes it does mistakes. Let me guide you how to deal with it:
If you use only one hard disk, select or leave /dev/sda intact.
If you use more than one hard disk with no RAID, select the one from which your system does boot. You can also select other disk and set BIOS to boot from it.
If you have RAID from which your system starts, it will be /dev/mapper/...
Be sure that you select entire disk, not a single partition!
After all, you should see your disk like this:
NOTE:You can have a maximum of 4 primary partitions, or 3 primary partitions and 1 logical (which allows for another 64 partitions)
The size above is 10.00GB. e.g 1,000 = 1GB 10,000 = 10GB (Remember to leave enough free remaining space to create your SWAP partition!)
Location for new partition: e.g. do you want it at the start or end of the free space. Select beginning.
Use as: Ext4 is the recommended file system for Ubuntu, much the same as NTFS is Windows. SWAP is for SWAP space.
Mount point: This is where you want the partition to mount. E.g. we need a root partition, which in Linux is denoted by a “/”.
I recommend you set the size of your SWAP partition to at least the size of your available RAM. If you have plenty of hard disk capacity I would suggest you use double the size. So if you have 2GB of RAM, set it to either 2GB or 4GB. For best performance it is recommended you have your SWAP partition at the beginning or end of your drive.
FINISHING UP
Click Install now button and then the wizard will ask you location. Select your location and click forward.
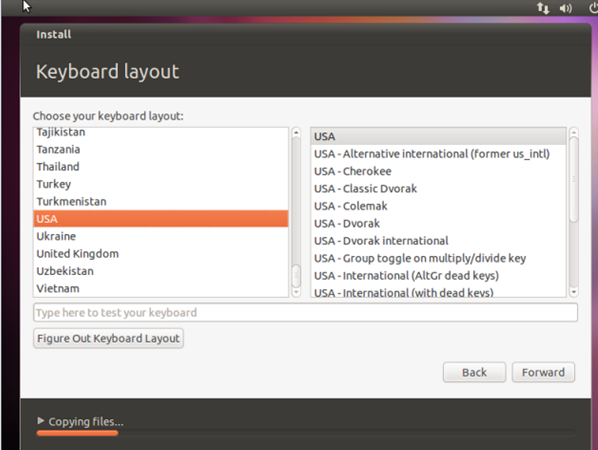
While you are selecting these options wizard will continue to copy files. Now select your desired keyboard layout and click forward.
Now fill in the details about yourself. Fill your name, computer name, choose a username and create a password and click forward and let ubuntu copy all the essential files.
After all files have been copied and installed ubuntu will display a message saying that installation complete and click on restart button to restart your computer. Remove the USB.
On restarting the grub window is prompted from where one can select the operating system one wishes to boot.
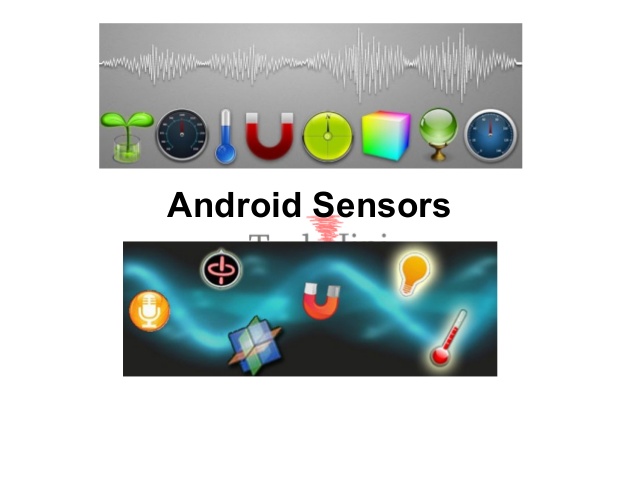
Most of the android devices have built-in sensors that measure motion, orientation, and various environmental condition. The android platform supports three broad categories of sensors.
Motion Sensors
Environmental sensors
Position sensors
Some of the sensors are hardware based and some are software based sensors. Whatever the sensor is, android allows us to get the raw data from these sensors and use it in our application. For this android provides us with some classes.
Android provides SensorManager and Sensor classes to use the sensors in our application. In order to use sensors , first thing you need to do is to instantiate the object of SensorManager class
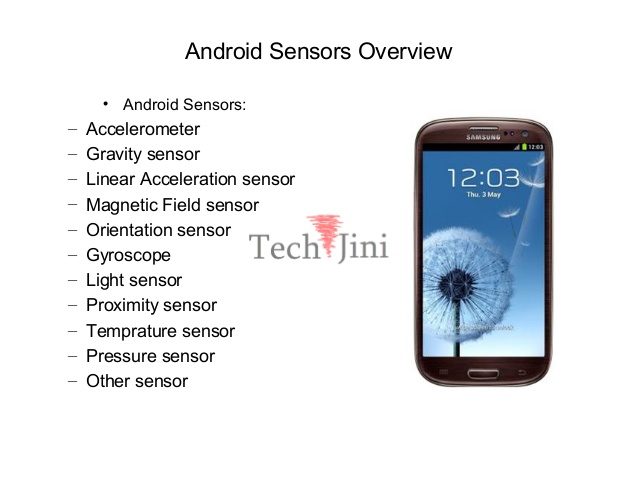
SENSORS OVERVIEW
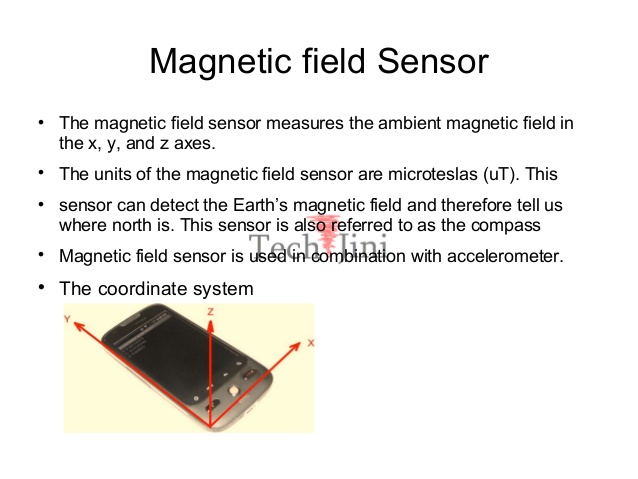
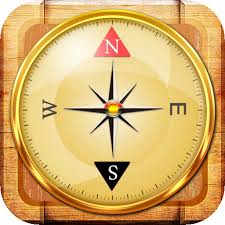
MAGNETOMETER
The smartphones have a small magnetometer built in, which can measure the Earth’s magnetic field. This information is combined with an accelerator that acquires information regarding the phone’s position in space. It is able to pinpoint the phone’s position from solid-state sensors within the phone that can measure their tilt and movement.
The magnetometer sensor in your tablet or smartphone also utilizes the modern solid state technology to create a miniature Hall-effect sensor that detects the Earth’s magnetic field along three perpendicular axes X, Y and Z. The Hall-effect sensor produces voltage which is proportional to the strength and polarity of the magnetic field along the axis each sensor is directed. The sensed voltage is converted to digital signal representing the magnetic field intensity. Other technologies used for magnetometer may include magneto resistive devices which change the measured resistance based on changes in the magnetic field.
MAGNETOMETER
ECLIPSE FOR ANDROID
Developing Android applications can be a fun and exciting experience. To get started creating Android applications, you need a proper development environment. This will allow you to use all the tools needed to create an app and ensure you work efficiently. I will show you how to setup a working environment using the Android SDK, Eclipse IDE, and ADT Plugin.
Step 1: Obtain the Android SDK
We need to obtain the Android Software Development Kit. To do that we must first visit the SDK download site below.
This will open an executable which will ask you about the installation process.
When you get to the install location screen, make sure you choose a location you remember (we will need it later)
Step 3: Open Android SDK Manager
Select the most recent version along with the extra SDK tools so you can build applications for any Android version.
Open the folder that we installed the SDK into.
You’ll see a executable called ‘SDK Manager’. Open it.
You’ll see a window where you can select different versions of Android to develop for.
Step 4: Install Android Version and Extras for SDK
Select the ‘Tools’ and ‘Android 6.0 (API 23)’ check boxes.
If you would like to have extra Android tools you can choose them from the ‘Extras’ selection.
You will then be prompted to accept the Android conditions and then the SDK will install. Then installation may take a while depending on your internet connection. The Android SDK is now completely installed.
Step 5: Obtain Eclipse IDE
Eclipse is the tool I’ll be using to develop in. It is the most popular Android development environment and has officially supported tools from Google.
Find the link for your operating system and 32/64 bit version.
Save the compressed download file.
Extract the downloaded Eclipse file into a safe place where you can keep the program.
Open the extracted folder and open the ‘eclipse’ executable.
Step 6: Add ADT Plugin
The ADT (Android Development Tool) Plugin was made specifically for Eclipse to increase productivity and integration with your Android work environment. To use it, we first add the Eclipse plugin repository so it knows where to find it along with updates.
In the Eclipse application menu, go to ‘Help’ and then ‘Install New Software’.
Click on the ‘Add…’ button and you’ll see a window appear.